Link to this document's Jupyter Notebook

There are two due dates for this assignment. First, you need to set up your assignment git repository on or before March 8th so your instructor can test and make sure everything is working as expected. Second, you then need to complete the assignment instructions and then add/commit/push your files to your git repository on or before 11:59pm on Thursday March 18. Your instructor highly recommends committing early and often.

NOTE: This homework will be hard to debug. Make sure you start early and ask questions when you get stuck. You have three weeks to complete this homework, use all of it!

ALSO: The instructor will try to make himself available to help you debug. If you want his help you need to ask early. I also recommend that you check your current code into your git repository so the instructor can download and reproduce the problem on his side.

Homework 3: CUDA Conway

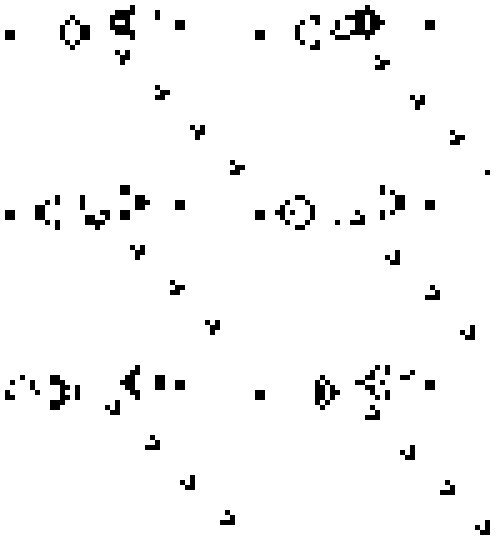
Animated GIF of the conway game of life simulation running

Glider Generator Example from Wikipedia

The Game of Life, also known simply as Life, is a cellular automaton devised by the British mathematician John Horton Conway in 1970.

The game is a zero-player game, meaning that its evolution is determined by its initial state, requiring no further input. One interacts with the Game of Life by creating an initial configuration and observing how it evolves, or, for advanced players, by creating patterns with particular properties.

The universe of the Game of Life is an infinite, two-dimensional orthogonal grid of square cells, each of which is in one of two possible states, alive or dead, (or populated and unpopulated, respectively). Every cell interacts with its eight neighbours, which are the cells that are horizontally, vertically, or diagonally adjacent. At each step in time, the following transitions occur:

  • Any live cell with fewer than two (<2) live neighbours dies, as if by underpopulation.
  • Any live cell with two or three [2-3) live neighbours lives on to the next generation.
  • Any live cell with more than three (>3) live neighbours dies, as if by overpopulation.
  • Any dead cell with exactly three (3) live neighbours becomes a live cell, as if by reproduction.

The initial pattern constitutes the seed of the system. The first generation is created by applying the above rules simultaneously to every cell in the seed; births and deaths occur simultaneously, and the discrete moment at which this happens is sometimes called a tick. Each generation is a pure function of the preceding one. The rules continue to be applied repeatedly to create further generations.

The game of life is used as a model in a number of different scientific domains. The following code is an OpenMP implamentation of Conway's Game of life. This example comes from here: http://ernie55ernie.github.io/parallel%20programming/2016/03/25/openmp-game-of-life.html

In this assignment, you are going to modify and improve the processing speed of Conway's Game of Life program using CUDA.

DO THIS: On or before March 8th Fork the instructor's repository, set the permissions, clone your fork to your HPCC account and make sure you can compile and run the software.

  1. Navigate to the Conway repository using your web browser and hit the "fork" button (upper right corner) and fork a copy to your personal namespace.
  2. Invite your instructor to be a "member" of your forked repository by selecting the "members" setting (lower left) and inviting entering their email (colbrydi@msu.edu) and setting the role to "Reporter".
  3. Change your "Project visibility" setting to "private" which can be found under "settings"-->"General" and clicking the "expand" button next to "Visibility, project features, permissions".
  4. Copy the URL for your forked repository and paste it to the following online form on or before March 8th (so your instructor can test permissions): Git repository Submission form
  5. Clone your forked repository on the HPCC and work from there.
  6. Change to the repository directory on a development node and run the following commands to verify the code is working:
    make clean
    make
    make test
    
  7. To complete this assignment commit all of your changes to your forked repository on or before 11:59pm on Thursday March 18

Note: if for any reason you can not figure out git, please review the git tutorial and go to your instructors office hours. If you would like, you may "tar zip" (tgz) a backup of your repository to your instructor on the by 11:59pm on Thursday March 18.

Goals for this assignment:

By the end of this assignment, you should be able to:

Homework Assignment

For this assignment you will do the following parts:

  1. Establish CPU Benchmark
  2. Cudify the code.
  3. Establish CUDA Benchmarks
  4. Final Report
  5. Deliverables

1. Establish CPU Benchmark

DO THIS: Benchmark the code provided using the "random" setting by using the following command:

echo "0 100" | ./gol

Where the zero for the first option specifies the random benchmark and the 100 is the number of iterations to test. Adjust the number of iterations to something that makes sense. Make sure you record the number of iterations and the name of the node for which you ran the tests. Graph the results.

You can also use the code by passing in a data file representing the start state of the system:

time ./gol < data.txt
time ./gol < data2.txt


The repository also includes a python file which generates some "interesting" Game of Life objects. You can use the "pipe" option to export the output of the python code into the Game of Life code using the following command:

python board_generator.py | ./gol

Practice using all of the above input options to make sure you understand how the code works.


2. Cudify the code.

DO THIS: First, update the makefile to use the cuda libraries:

  1. Log onto a CUDA dev node and load the compilers using module load CUDA.
  2. Copy all c source files using the cu (instead of c) extension (this is needed by nvcc).
  3. Change the extension variable (EXT) from c to cu in the makefile
  4. Change the compiler variable (CC) from gcc to nvcc in the makefile.

At this point you should be able to still compile and test the code in serial. We haven't actually made the code run on GPUS; we are just use the nvcc compiler instead of gcc. You should now be able to make clean, make, and make test.

DO THIS: Next, cudify the code. Here are the basic tasks you need to complete. Note that these are recommendations and you may want to come up with a slightly different solution:

  1. Allocate a memory array on the GPU that is the same size as the plate array on the cpu.
  2. Before the main loop, copy the start state of the plate over to the GPU.
  3. Write a kernel that will update the state of the plate on the GPU. It is recommended that the kernel takes three inputs; pointer to the GPU plate memory, the size of the simulation n, and which plate is the current plate.
  4. The main loop should be on the CPU side and will call the CUDA kernel.
  5. After the main loop, copy the GPU memory back to the CPU.
  6. Print the final state of the plate (Also an option to save as an image).
  7. Don't forget to free up the GPU memory.

Make sure you also use the following:

Here are yet some more hints:


3. Establish CUDA Benchmarks

DO THIS: Benchmark the CUDA version of the code. Make sure you carefully note the types of changes you make and use proper synchronization. Also be very clear which version of the code was used in the benchmark, what imput settings were used and which HPCC computer resource was used. Plot your results in meaningful and easy to understand ways.


4. Final Report

DO THIS: Write a report describing what you learned (There is a template in the instructor's git repository). The report should be written in either Markdown or Jupyter notebooks. Start by describing how the provided serial code performed and what you did to accurately measure that performance. Then talk about what you did to optimize the serial performance. Finally, describe what you did to add in CUDA code to make it hopefully run faster. Make sure you include well labeled graphs of all of your benchmarking data and explain the graphs in your report text with a focus on any odd results you may see. Conclude with a general lessons learned.

The code generates images you should include a few in your report.


5. Deliverables

DO THIS: Prepare your files for the instructor. I recommend having three versions of the code; original serial version, optimized serial version, optimized CUDA version. Update the provided Makefile to build all three executables. The files should include.

When you are done, add/commit and push all of your changes to your forked git repository. Your instructor will use the following command to compile and test your code on the HPCC:

make clean
make 
make test

Congratulations, you are done!

Submit your tgz file to the course Desire2Learn page in the HW1 assignment.

Written by Dr. Dirk Colbry, Michigan State University Creative Commons License
This work is licensed under a Creative Commons Attribution-NonCommercial 4.0 International License.